

Why Store-Bought Mixes Are Ripping You Off
We all love convenience, but store-bought dry mixes are some of the most overpriced grocery items you can buy. They’re filled with preservatives, artificial flavors, and hidden additives that do more harm than good. With just a few pantry staples and some mason jars, you can make your own for a fraction of the cost—without the junk!
The Hidden Costs of Packaged Mixes
Cost per serving: Pre-made mixes often cost 3-5 times more than homemade versions.
Questionable ingredients: Many contain MSG, hydrogenated oils, and artificial preservatives linked to gut health issues and inflammation.
Less control: Why settle for low-quality ingredients when you can make it better, healthier, and cheaper yourself?
Why Making Your Own Mixes is a Game-Changer
✅ Save hundreds per year by making your own staple dry mixes.
✅ Ditch harmful additives and replace them with clean, real ingredients.
✅ Shelf-stable convenience—have instant meal and baking mixes ready to go!
✅ Reduce food waste by controlling portion sizes and ingredient freshness.
✅ Flavor customization—adjust seasonings and spices to suit your taste.
By making the switch to homemade dry mixes, you’re taking back control of your kitchen—your health, your budget, and your ingredients! Now, let’s get into the recipes that will revolutionize your pantry.
1. Chicken Bouillon Powder in a Jar – Just Add Water! 🐔🔥
If you love the rich, savory taste of chicken broth but want a shelf-stable, plant-based, or budget-friendly alternative, nutritional yeast is the perfect foundation for a homemade dry mix chicken-flavored bouillon. This umami-packed powerhouse naturally enhances the depth of flavor with its slightly nutty, cheesy, and roasted notes—without needing actual chicken. Plus, it’s loaded with B vitamins, making it a nutritious addition to soups, stews, gravies, and even rice or roasted veggies.
By blending nutritional yeast with a few key seasonings—like garlic powder, onion powder, herbs, and a touch of turmeric for color—you can create a versatile, cost-effective bouillon that rivals store-bought options while staying free from fillers, preservatives, and excess sodium. Whether you’re stocking your pantry for everyday cooking or emergency preparedness, this homemade blend is a game-changer!
Want the full recipe? Keep reading for my favorite go-to mix!

💰 Better Than Bouillon? Try This 74% Cheaper, Shelf-Stable Bouillon Powder in a Jar!
Have you ever looked at the price of store-bought bouillon and wondered if there’s a better (and cheaper) way? A jar of Knorr or Better Than Bouillon will set you back around $6 for just 12 servings, which breaks down to about $0.50 per cup of broth. But what if I told you that you could make your own homemade bouillon powder for just $4—and get 32 servings out of it? That’s just $0.13 per cup of broth—a 74% savings! 💸
This Bouillon Powder in a Jar recipe is a pantry staple you’ll want to keep stocked. It makes approximately 3 ½ cups of dry mix, perfectly fitting into a 1-quart jar. Just scoop out what you need and mix it with hot water whenever you’re making soups, stews, sauces, rice, or even sipping broth.
Serving Size & Yield:
- Serving size: 1 tablespoon of bouillon powder per 8 oz (1 cup) of hot water
- Total servings: About 32 servings (or 32 cups of broth)
With a rich, savory flavor and a shelf life that lasts months, this homemade bouillon mix is not only budget-friendly but also free of additives, fillers, and excess sodium found in many store-bought options. Ready to make your own? Let’s dive in!
Dry Mix Ingredients (For 1 Quart Jar)
2 cups nutritional yeast (adds deep umami richness!)
⅓ cup salt (balances flavors—reduce if needed!)
¼ cup garlic powder (bold, aromatic depth!)
¼ cup onion powder (savory sweetness!)
¼ cup dried basil (fresh herbal notes!)
¼ cup dried oregano (earthy & slightly peppery!)
¼ cup dried rosemary (adds woodsy complexity!)
1 ½ – 2 tablespoons ground black pepper (adds a warm kick!)
½ tablespoon xanthan gum (for a velvety, slightly thickened broth!)
1 teaspoon celery salt (extra savory depth!)
1 teaspoon turmeric (adds golden color & anti-inflammatory benefits!)
½ tablespoon Herbs de Provence (classic French herb blend for elegance!)
How to Make Broth
- Mix 1 tablespoon of bouillon powder into 8 ounces (1 cup) of hot water.
- Stir well, let dissolve, and enjoy as a flavorful sipping broth or use in soups, stews, sauces, and gravies!
✨ For extra richness, whisk with melted butter or coconut oil before serving.
💡 Store in an airtight quart jar for up to 1 year in a cool, dry place.
📌 Download your Pantry Mix recipe cards here!
2. Maple Cinnamon Rolls in a Jar – Just Add Water! 🥮🍁
Why Cinnamon Roll Mix in a Jar Beats Those Exploding Cans Every Time
We’ve all been there—standing in the kitchen, cautiously peeling back the label on a can of store-bought cinnamon rolls, bracing for the inevitable POP! that startles the soul. But what if I told you there’s a better way? A way that gives you all the warm, gooey goodness without the preservatives, questionable ingredients, or the anxiety of an unexpected explosion?
Enter: Cinnamon Roll Mix in a Jar. This pantry staple means you can whip up fresh, homemade cinnamon rolls whenever the craving hits—without mystery additives or that artificial aftertaste. Plus, it’s shelf-stable, cost-effective, and customizable (extra cinnamon? Yes, please!). No more rushing to the store or settling for lackluster dough. Just simple, wholesome ingredients that come together for the most satisfying, made-from-scratch cinnamon rolls.
Trust me, once you try it, you’ll never go back to the pop-can panic.

Why Cinnamon Roll Mix in a Jar Just Makes Sense
Let’s talk numbers. A can of Pillsbury cinnamon rolls will set you back about $4.99 for eight rolls—not terrible, but not exactly a bargain either. That comes out to $0.62 per roll for a dough that’s packed with preservatives and artificial flavors.
Now, let’s compare that to homemade. With a simple, shelf-stable cinnamon roll mix in a jar, you can make 20 rolls for just $3.50—bringing the cost down to $0.17 per roll. That’s a 73% savings for a fresher, better-tasting result. Plus, you control the ingredients, the flavor, and the quality.
The best part? You’re not at the mercy of grocery store prices, last-minute runs to the store, or that dreaded POP of an exploding can. Instead, you have a ready-to-go mix sitting in your pantry, waiting to transform into warm, fluffy cinnamon rolls whenever the craving strikes.
Homemade wins every time.
Dry Mix Ingredients (For 2 Quart Jars)
For the Dough:
4 cups sprouted spelt flour (or all-purpose flour for a classic texture!)
½ cup dehydrated maple syrup (adds natural sweetness & rich maple flavor!)
4 teaspoons baking powder (for a fluffy rise!)
1 teaspoon baking soda (balances acidity for tenderness!)
½ teaspoon salt (enhances all the flavors!)
For the Filling (Layered in a Separate Small Bag Inside the Jar):
½ cup coconut sugar or brown sugar (natural caramel-like sweetness!)
2 tablespoons Ceylon cinnamon (milder & more complex than Cassia!)
For the Icing Mix (Sealed in Another Small Bag Inside the Jar):
1 cup powdered sugar (for classic drizzle!)
¼ cup powdered cream cheese (adds that tangy, creamy richness!)
½ teaspoon vanilla bean powder (for real vanilla flavor!)
Storage & Shelf Life
💡 Store dry mix in an airtight jar for up to 6 months in a cool, dry place.
✨ Bonus Tip: Want even more maple goodness? Brush warm rolls with melted butter + maple syrup before icing!
📌 Download your Panty Mix Recipe Cards here!
3. Cheesy ‘Hamburger Helper’ in a Jar – Just Add Water! 🧀🍝
The Convenience Myth: Why Boxed Hamburger Helper Isn’t Really Helping
Boxed Hamburger Helper sells itself as a quick and easy meal solution, but let’s take a closer look. What are you actually paying for? A pouch of powdered cheese and some macaroni. That’s it. The box isn’t giving you the key ingredients that actually make the meal—you still have to add your own ground beef, milk, and butter.
And here’s the kicker: you probably already have pasta, seasonings, and cheese in your pantry. So why spend extra on a box that’s mostly filler and preservatives when you can make a fresher, more flavorful version in the same amount of time? With a simple homemade mix, you control the quality, the sodium, and the flavor—without the unnecessary additives.
The truth is, boxed Hamburger Helper isn’t saving you time, effort, or even money. It’s just dressing up basic ingredients you already own in fancy packaging. Ditch the box, keep the convenience, and make a real homemade meal instead.
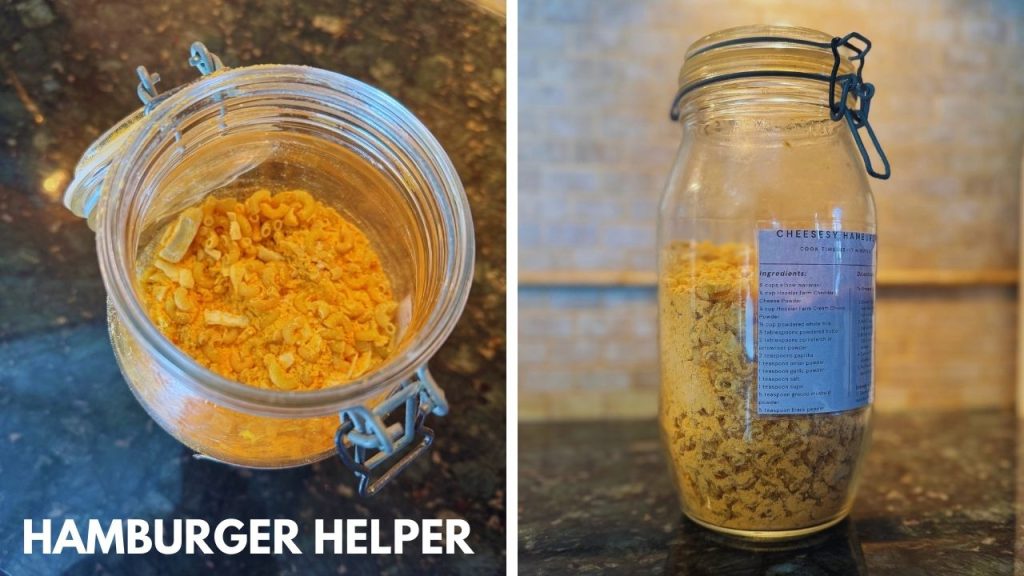
📌 Yields 2 Quarts | Makes 4 Batches (Each batch serves 4-6 people)
Dry Mix Ingredients
6 cups elbow macaroni (classic comfort food shape!)
½ cup Hoosier Farm Cheddar Cheese Powder (real cheese flavor!)
¼ cup Hoosier Farm Cream Cheese Powder (for an extra creamy, tangy boost!)
⅓ cup powdered whole milk (adds luxurious creaminess—no fresh milk needed!)
3 tablespoons powdered butter (rich and buttery texture!)
2 tablespoons cornstarch or arrowroot powder (thickens the sauce perfectly!)
2 teaspoons paprika (adds warmth & color!)
1 teaspoon onion powder (sweet & savory depth!)
1 teaspoon garlic powder (a must-have flavor booster!)
1 teaspoon salt (balances everything out!)
1 teaspoon sugar (enhances flavors subtly!)
½ teaspoon ground mustard powder (secret weapon for extra cheesy tang!)
½ teaspoon black pepper (just a touch for balance!)
To Prepare (1 Batch = Serves 4-6)
1️⃣ Brown 1 lb ground beef in a large skillet over medium heat. (Optional: use freeze-dried beef for a fully shelf-stable meal!)
2️⃣ Add 2 cups water and 1 heaping cup of dry mix to the skillet. Stir well.
3️⃣ Bring to a gentle simmer, cover, and let cook for 10-12 minutes, stirring occasionally until pasta is tender.
4️⃣ Turn off heat and let sit for 2-3 minutes to thicken.
5️⃣ Fluff and serve! Enjoy a creamy, cheesy, nostalgic favorite with zero hassle.
Storage & Shelf Life
💡 Store dry mix in a sealed quart jar for up to 6 months in a cool, dry place.
📌 Download your Pantry Mix Recipe Cards here!
4. Copy Cat Rice-a-Roni Mix -Just Add Water!
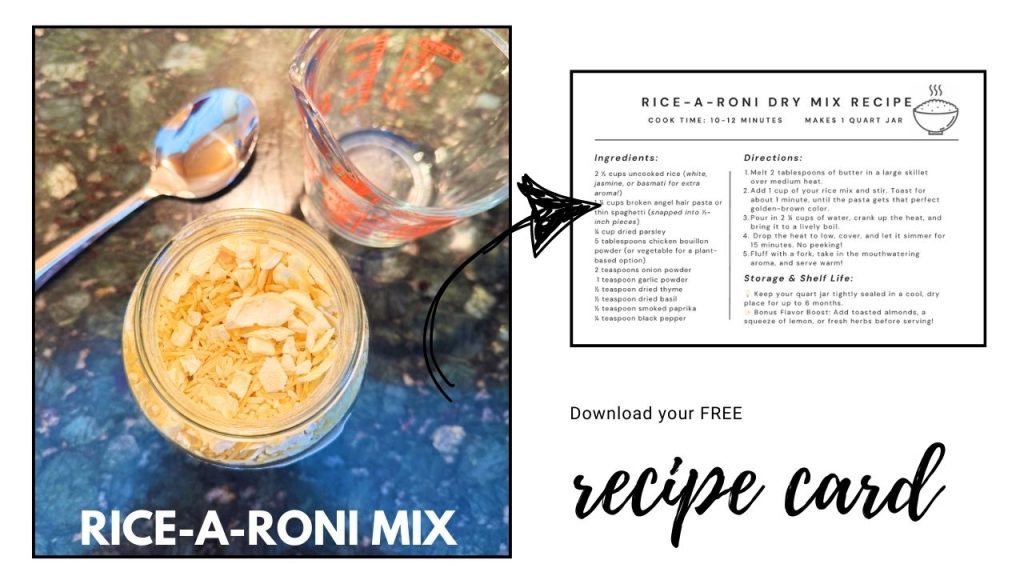
Skip the Box: Make Your Own Copycat Rice-A-Roni
Rice-A-Roni might call itself “the San Francisco Treat,” but the real treat is realizing you can make it better, cheaper, and just as easy—without the box.
Think about it: what’s really in that package? A small amount of rice, a handful of broken vermicelli, and a seasoning packet full of preservatives and excess sodium. You still have to add your own butter and broth. So what are you really paying for?
With a simple homemade mix, you can skip the additives and control the flavor while keeping the same quick and easy preparation. Plus, it costs a fraction of the price, stores beautifully in your pantry, and can be customized with your favorite herbs and seasonings.
Once you try homemade Rice-A-Roni, you’ll wonder why you ever paid for a box of what’s basically just rice.
Dry Mix Ingredients (for 1 Quart Jar)
📌 Fits in a Quart-Sized Jar | Yields 4 Batches (1 cup per batch, serves 4 each time)
2 ½ cups uncooked rice (white, jasmine, or basmati for extra aroma!)
1 ¼ cups broken angel hair pasta or thin spaghetti (snapped into ½-inch pieces)
¼ cup dried parsley (adds freshness and color)
5 tablespoons chicken bouillon powder (or vegetable for a plant-based option)
2 teaspoons onion powder (sweet, savory depth)
1 teaspoon garlic powder (a little extra for that garlicky goodness!)
½ teaspoon dried thyme (earthy & aromatic!)
½ teaspoon dried basil (adds a little brightness)
½ teaspoon smoked paprika (for a hint of warmth and color!)
¼ teaspoon black pepper (a touch of balance and bite!)
To Prepare (1 Batch = About 4 Servings)
1️⃣ Melt 2 tablespoons of butter in a large skillet over medium heat.
2️⃣ Add 1 cup of your rice mix and stir. Toast for about 1 minute, until the pasta gets that perfect golden-brown color.
3️⃣ Pour in 2 ¼ cups of water, crank up the heat, and bring it to a lively boil.
4️⃣ Drop the heat to low, cover, and let it simmer for 15 minutes. No peeking!
5️⃣ Fluff with a fork, take in the mouthwatering aroma, and serve warm!
Storage & Shelf Life
💡 Keep your quart jar tightly sealed in a cool, dry place for up to 6 months.
✨ Bonus Flavor Boost: Add toasted almonds, a squeeze of lemon, or fresh herbs before serving!
📌 Download your Pantry Mix Recipe Cards here!
5. Just-Add-Water Rustic Loaf Bread Mix
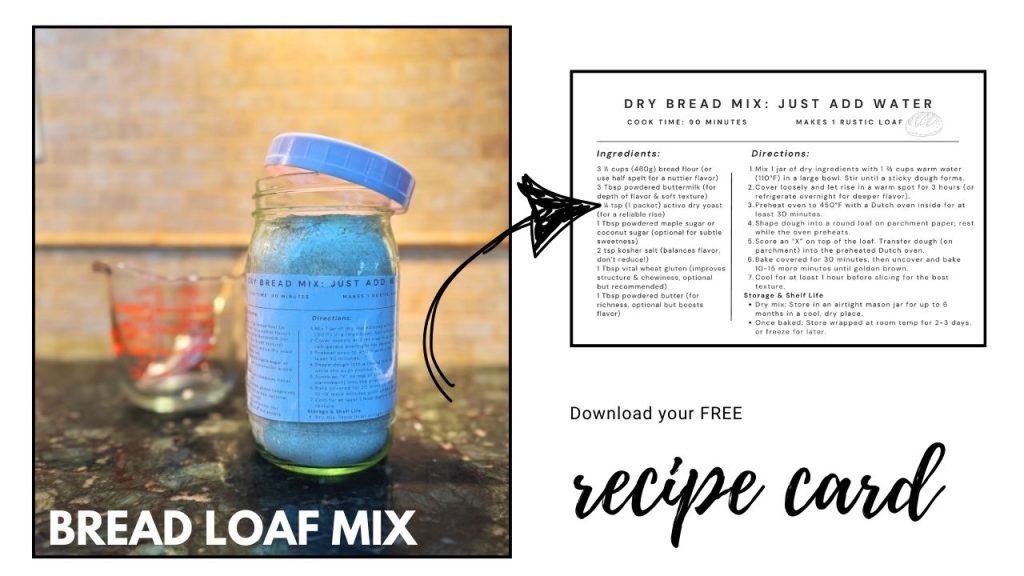
Artisan Bread in a Jar: Fresh-Baked Simplicity at Your Fingertips
There’s nothing quite like the smell of fresh-baked bread filling your kitchen—but who has time for complicated recipes and endless kneading? That’s where my Artisan Bread Loaf Mix in a Jar comes in.
With just a few pantry staples, you can have a crusty, golden-brown loaf with a soft, airy crumb—no fancy equipment or hours of work required. Just add water, mix, let it rest, and bake. No preservatives, no unnecessary additives—just real, homemade bread that tastes better than anything from the store.
Having this mix on hand means fresh, bakery-style bread is always within reach. Whether you’re serving it with soup, using it for sandwiches, or just slathering it with butter straight from the oven, this is homemade goodness at its easiest—and most delicious. 🍞✨
Dry Mix Rustic Bread Recipe (Per Quart-Sized Jar)
📌 Makes 1 loaf (Quart-Sized Mason Jar Mix)
Bake Time: 30-40 minutes
Yields: 1 round artisan-style loaf (approx. 10 slices)
3 ½ cups (460g) bread flour (or use half spelt for a nuttier flavor)
3 Tbsp powdered buttermilk (for depth of flavor & soft texture)
2 ¼ tsp (1 packet) active dry yeast (for a reliable rise)
1 Tbsp powdered maple sugar or coconut sugar (optional for subtle sweetness)
2 tsp kosher salt (balances flavor, don’t reduce!)
1 Tbsp vital wheat gluten (improves structure & chewiness, optional but recommended)
1 Tbsp powdered butter (for richness, optional but boosts flavor)
Instructions – Just Add Water & Bake!
To prepare:
Mix 1 jar of dry ingredients with 1 ⅔ cups warm water (110°F) in a large bowl. Stir until a sticky dough forms.
Cover loosely and let rise in a warm spot for 3 hours (or refrigerate overnight for deeper flavor).
Preheat oven to 450°F with a Dutch oven inside for at least 30 minutes.
Shape dough into a round loaf on parchment paper; rest while the oven preheats.
Score an “X” on top of the loaf. Transfer dough (on parchment) into the preheated Dutch oven.
Bake covered for 30 minutes, then uncover and bake 10-15 more minutes until golden brown.
Cool for at least 1 hour before slicing for the best texture.
Storage & Shelf Life
Dry mix: Store in an airtight mason jar for up to 6 months in a cool, dry place.
Once baked: Store wrapped at room temp for 2-3 days, or freeze for later.
📌 Download your Pantry Mix Recipe Cards here!
6. Just-Add-Water Pancake Mix
The Only Pancake Mix You’ll Ever Need—Because Breakfast Should Be Effortless
Mornings are busy enough without measuring out flour, baking powder, and salt before your coffee kicks in. That’s why having homemade pancake mix ready to go is a total game-changer.
Forget the boxed stuff—this mix is fresher, fluffier, and free of preservatives. With just a quick scoop and a splash of milk, eggs, and butter, you’ll have golden, pillowy pancakes on the table in minutes. No more scrambling for ingredients or settling for pancakes that taste like cardboard.
Make a big batch, store it in a jar, and let breakfast be the easiest (and tastiest) part of your day.
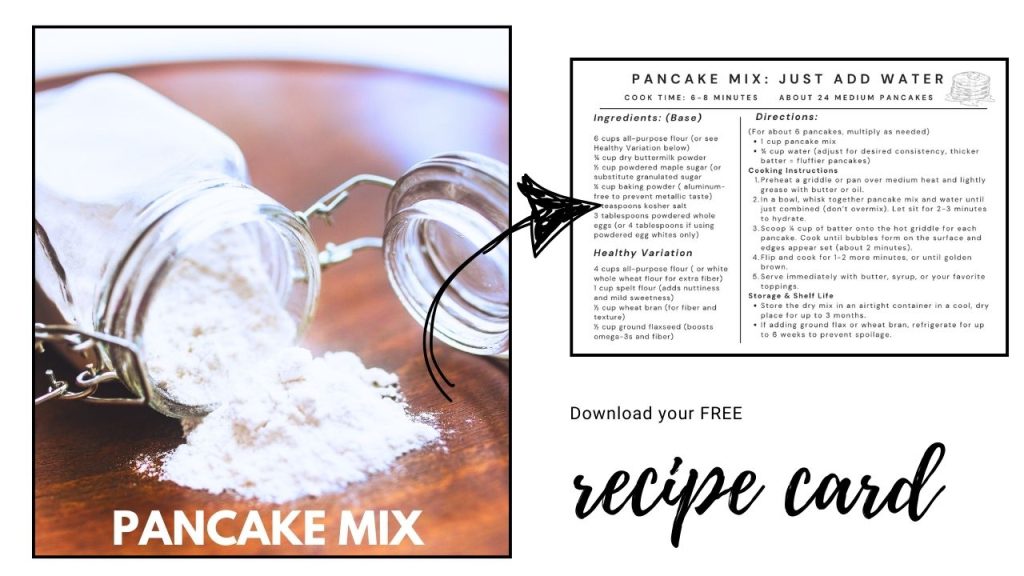
Why This Mix Tastes Amazing
✅ No baking soda aftertaste – Balanced leavening with buttermilk and aluminum-free baking powder.
✅ Dry buttermilk + powdered eggs – Creates fluffy, rich pancakes with extra depth.
✅ Maple sugar adds natural sweetness – Enhances flavor without artificial flavors.
✅ Healthier option included – Spelt, bran, and flax boost fiber & nutrients without sacrificing texture.
Dry Pancake Mix (Base Recipe)
(Makes approximately 24 medium pancakes, 4-6 servings)
6 cups all-purpose flour (or see Healthy Variation below) (840g)
¾ cup dry buttermilk powder (90g)
½ cup powdered maple sugar (100g, or substitute granulated sugar if unavailable)
¼ cup baking powder (30g, aluminum-free to prevent metallic taste)
2 teaspoons kosher salt (10g)
3 tablespoons powdered whole eggs (18g, or 4 tablespoons if using powdered egg whites only)
Optional Healthy Variation (to replace 2 cups of AP flour)
4 cups all-purpose flour (560g, or white whole wheat flour for extra fiber)
1 cup spelt flour (140g, adds nuttiness and mild sweetness)
½ cup wheat bran (50g, for fiber and texture)
½ cup ground flaxseed (50g, boosts omega-3s and fiber)
How to Prepare the Pancakes
(For about 6 pancakes, multiply as needed)
1 cup pancake mix
¾ cup water (adjust for desired consistency, thicker batter = fluffier pancakes)
1 teaspoon vanilla extract (optional, but adds great depth of flavor)
Cooking Instructions
Preheat a griddle or pan over medium heat and lightly grease with butter or oil.
In a bowl, whisk together pancake mix and water until just combined (don’t overmix). Let sit for 2-3 minutes to hydrate.
Scoop ¼ cup of batter onto the hot griddle for each pancake. Cook until bubbles form on the surface and edges appear set (about 2 minutes).
Flip and cook for 1-2 more minutes, or until golden brown.
Serve immediately with butter, syrup, or your favorite toppings.
Storage & Shelf Life
Store the dry mix in an airtight container in a cool, dry place for up to 3 months.
If adding ground flax or wheat bran, refrigerate for up to 6 weeks to prevent spoilage.
📌 Download your Pantry Mix Recipe Cards here!

7. Mason Jar Banana Bread Mix (with real banana chips) Just Add Water!

Banana Bread Mix in a Jar: Homemade Comfort, Made Easy
There’s something magical about warm, fresh-baked banana bread—the golden crust, the soft, moist center, and that irresistible aroma filling your kitchen. But who wants to haul out all the ingredients every time a craving hits?
With Banana Bread Mix in a Jar, you get all the homemade goodness without the hassle. Just add mashed bananas, eggs, and butter, and in no time, you’ll have a loaf that’s perfectly sweet, incredibly moist, and packed with real flavor—no preservatives, no shortcuts, just real ingredients.
Keep a jar in your pantry for last-minute baking, surprise guests, or when those overripe bananas are begging to be used. Once you see how easy (and delicious) it is, you’ll never go back to store-bought banana bread again. Just add wet ingredients when ready to bake.
Dry Ingredients (Layer in a Mason Jar)
1 cup all-purpose flour (or whole wheat for a heartier loaf)
½ cup oat flour (or additional all-purpose)
½ cup coconut sugar (or brown sugar)
2 tsp baking powder
½ tsp baking soda
½ tsp salt
1 tsp ground cinnamon
¼ tsp ground nutmeg
½ cup dried banana chips, crushed slightly
¼ cup chopped walnuts or pecans (optional)
¼ cup powdered milk or coconut milk powder (for extra richness)
Wet Ingredients (To be added later)
2 eggs (or 2 tbsp powdered egg + ¼ cup water)
½ cup water or milk (adjust if using powdered milk)
⅓ cup melted butter or coconut oil
1 tsp vanilla extract
Instructions for Baking
1. Preheat oven to 350°F (175°C). Grease a loaf pan or line with parchment paper.
2. Combine dry mix in a bowl.
3. In a separate bowl, whisk together eggs, water/milk, melted butter, and vanilla.
4. Add wet ingredients to dry mix and stir just until combined.
5. Pour batter into the loaf pan and bake for 40-45 minutes, or until a toothpick comes out clean.
6. Let cool before slicing. Enjoy!
📌Download your Pantry Mix Recipe Cards here!

Final Thoughts: Take Back Your Pantry & Save Big!

By making these homemade just-add-water mixes, you’re not only saving money but also ensuring that you and your family are eating cleaner, healthier meals without unnecessary additives.
These recipes give you all the convenience of store-bought mixes without the unnecessary fillers, preservatives, and sky-high prices. Plus, they make fantastic DIY gifts, emergency pantry staples, and meal prep solutions for busy weeks.
✨ What to do next:
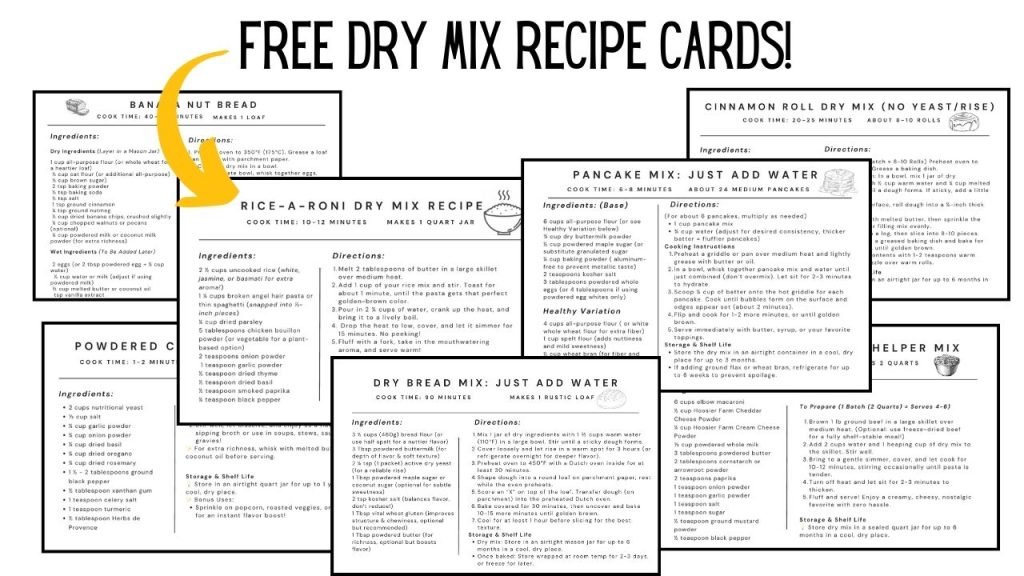
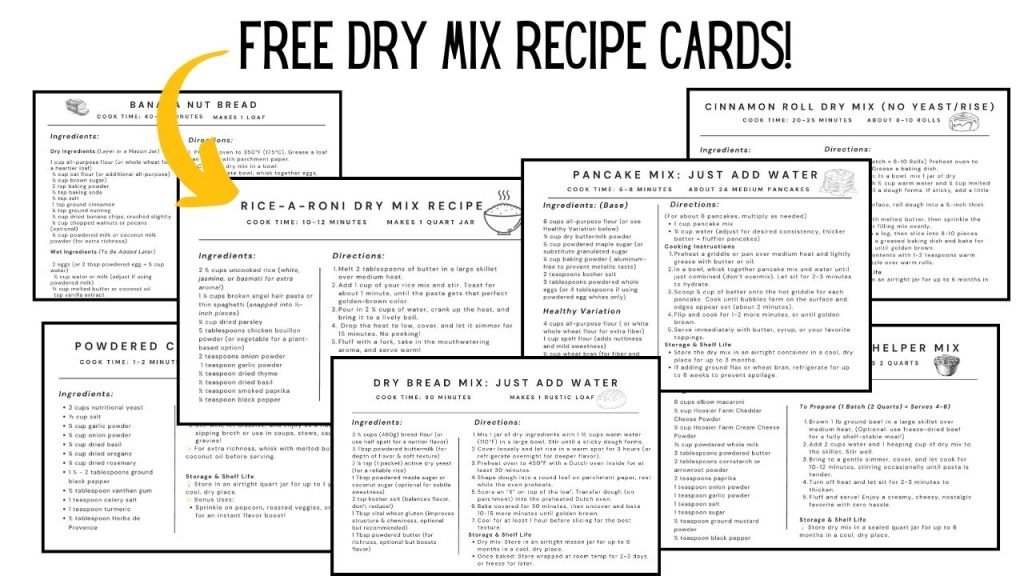
📌 Download the free printable recipe cards to keep in your kitchen binder.
🎥 Subscribe to my YouTube channel for even more homemade pantry staples & meal prep hacks. 📩
Sign up for my Grocery Guide for weekly cost-cutting kitchen strategies & exclusive recipes!
What homemade mix are you excited to try first? Let me know in the comments! 👇


